

HOT SALE


APPLICATION


Phone:+86-15215969856 E-Mail: 396838165@qq.com
You’ve put time into designing patterns with digital tools, only to pull out prints that look fuzzy or off-color. It’s a common hurdle in working with dye sublimation ink. This guide walks you through pinpointing and fixing those issues, step by step. We’ll cover everything from spotting why your results fall short to fine-tuning your setup for sharp, vivid outcomes. Whether you’re printing on textiles or other materials, understanding these fixes can turn frustrating sessions into smooth ones. By the end, you’ll have tools to make every run with your sublimation printer deliver true color sublimation ink results that pop.

Identify the Causes of Disappointing Print Results
When prints don’t look like what’s on your screen, it usually comes from a few main reasons. Soft edges, light shades, or rough lines can ruin good designs. Let’s look at them closely. We start with those unclear edges that lose their sharpness.
Address Blurry Output and Loss of Detail
Blurry prints sneak up when the sublimation transfer paper shifts just a bit during the heat press. It might be from loose taping or air pockets trapped underneath. Or perhaps the pressure isn’t even across the surface, leaving some areas crisp while others smear.
To fix this, first stick your paper down with heat-resistant tape on every side. Push hard to get rid of bubbles. If you work on round things, use a tumbler press. It keeps stuff still. Wait until everything cools down before you pull off the paper. If you move it early, the ink might smear. From checks, prints at 300 DPI or more stay clearer, mainly on polyester fabrics.
But blurriness isn’t always about the press. Sometimes it’s tied to how colors render, which brings us to the next issue. Faded or mismatched tones can make details vanish just as much as a shift in paper.
Correct Dull and Inaccurate Colors
Dull colors hit when the dye sublimation ink doesn’t bond right with the material. Low polyester content in fabrics is a big culprit—anything under 65% lets the ink wash out fast. Or it could be mismatched settings in your sublimation printer, where the ink levels run low or the resolution dips below 300 DPI.
Begin by choosing blanks with at least 75% polyester. But 100% gives the brightest sublimation ink results. Look at your ink cartridges. Swap them out before they run dry to keep the flow even. Change your printer program to high-quality setting. And always do a test strip first. Good vibrant sublimation ink from a trusted sublimation ink supplier helps a lot. Cheap ones often lose color faster.
These shade problems can mix with clear lines in the print. If marks appear, it might show bigger issues in how ink comes out.

Fix Streaks and Banding Lines
Streaks or banding appear as thin lines where ink skips or bunches up. This usually traces back to clogged nozzles in the sublimation printer or too much ink saturation in the settings. Dust buildup or dried ink from sitting idle worsens it.
Run a nozzle check on your printer—most models have this built in. If lines are missing, do a head cleaning cycle, maybe twice if it’s stubborn. Lower the ink density in your software by 10-15% to avoid overload. Keep the printer in a dust-free spot, and print something weekly to circulate the dye sublimation ink. In one case, switching to uni-directional printing mode cleared up banding on a Epson model.
Solve Printer Clogs and Ink Flow Issues
Clogs disrupt everything, from color accuracy to smooth output. They build when dye sublimation ink dries in the lines or nozzles, often from rare use or poor storage. Addressing them early keeps your sublimation printer running without hitches.
Perform an Effective Printhead Cleaning Routine
A clogged printhead blocks true color sublimation ink from flowing evenly. Signs include missing colors or faint patches in test prints.
Begin with the printer’s own cleaning function—run it once, then print a nozzle pattern to check. If gaps remain, repeat up to three times. Use a lint-free cloth dipped in isopropyl alcohol to wipe rollers gently. For stubborn clogs, print a full-page purge sheet in each color; this flushes out buildup. One printer owner cleared a yellow line clog after two purges, saving a batch of prints.
Cleaning alone isn’t enough if storage habits contribute to the problem. Proper upkeep extends the life of your setup and prevents repeats.
Master Proper Printer Storage and Maintenance
Bad storage lets moisture or dust sneak in, thickening the sublimation ink over time. Keep your sublimation printer in a cool, dry place. Try for 50-70% humidity to hold ink loose. Cover the machine when you don’t use it. But don’t close it too tight. Swap filters every six months or after 500 prints, whatever comes first. People who use it often say weekly test prints keep flow better than deep cleans each month.
Beyond basic storage, the filtration system plays a role in keeping ink pure. If overlooked, it can lead to uneven delivery.
Check Your Ink Filtration System
Filters catch debris that could jam nozzles, but they clog too if not monitored. Inspect filters monthly—look for discoloration or slow drip. Replace them if ink flow lags during prints. Use only compatible filters from your sublimation ink supplier to avoid mismatches. In practice, a clean system can boost print speed by 20%, reducing banding risks.
Achieve Flawless Color Consistency
Color shifts frustrate when one print shines and the next dulls. Consistency comes from calibrated tools and matched materials, turning variable results into reliable ones.
Creating and Sticking to an ICC Profile
An ICC profile maps colors from screen to print, ensuring dye sublimation ink reproduces hues accurately.
Download the profile for your specific vibrant sublimation ink and paper combo from the manufacturer. Load it in your printing software—select it under color management. Print a color chart, compare to your monitor, and tweak if needed. Stick to it for every job; deviating causes mismatches. Users find that custom profiles cut color errors by half on textiles.
Profiles work best when tailored to fabrics. Different materials absorb ink uniquely, so adjustments keep colors true.
Calibrate Settings for Different Fabrics
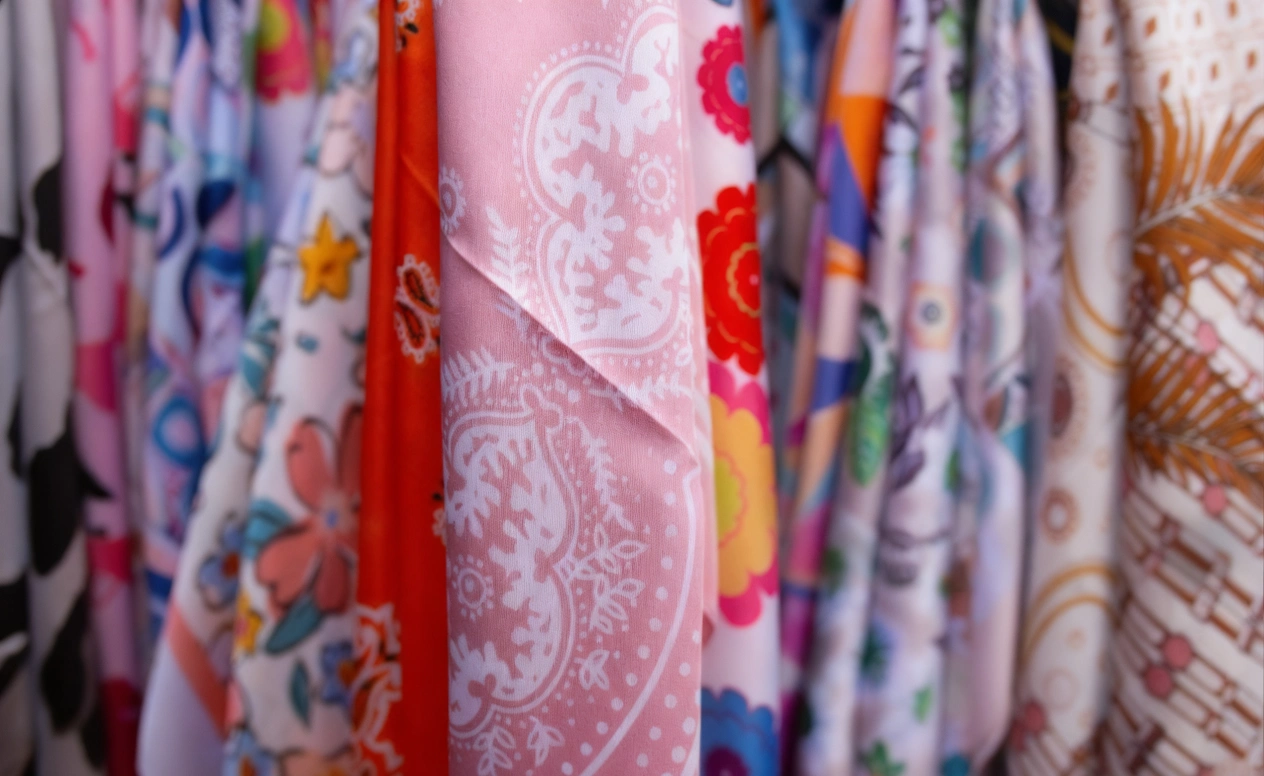
Fabrics vary—cotton blends fade fast, while synthetics hold better. Test swatches: Print on polyester at 385°F for 45 seconds, then try nylon at 375°F for 50 seconds. Note vibrancy and adjust. Use an infrared thermometer to verify heat accuracy. For mixed fabrics, aim for 70% polyester minimum. Real tests show nylon needs lower heat to avoid scorching, preserving true color sublimation ink depth.
Even with calibration, the ink-paper pair must align. Mismatches throw off the whole process.
Ensure Your Ink and Paper are a Perfect Match
Incompatible ink and paper lead to poor adhesion or bleeding.
Choose sublimation transfer paper rated for your dye sublimation ink type—high-release for vibrant transfers. Test pairs: Print a grid, transfer, and check for bleed. A good match yields sharp edges without fade. From experience, 100 GSM paper pairs well with CMYK inks for textiles, reducing waste.
Optimize the Transfer Process for the Best Outcome
The transfer seals the deal—get it wrong, and earlier efforts wasted. Balance heat, time, and materials for flawless bonds.
I. Find the Precise Time and Temperature Balance: Wrong heat or timing makes colors shift or fade. Start at 385°F for most polyester, pressing for 50 seconds. Bump to 400°F for thicker fabrics but drop time to 45 seconds to avoid browning blacks. Use a timer—over by 10 seconds, and the ink breaks down. Balance extends to pressure. Uneven force creates patches or lines.
II. Ensure Even Pressure and Heat Distribution: Spotty pressure leaves weak spots where ink doesn’t transfer fully. Check your press with a heat gun—aim for uniform temps across the platen. Adjust knobs for medium pressure; too hard squeezes ink out. Add a foam pad under uneven items like seams. Tests reveal even pressure boosts color saturation by 15-20%. With pressure set, paper choice ties it together. The right one releases ink cleanly.
III. Choose and Apply the Right Transfer Paper: Poor paper holds ink back or lets it bleed. Pick high-release sublimation transfer paper, like 80-100 GSM for smooth flow. Cut to size, rip edges to avoid marks. Apply face down on the blank, and tape securely. Dry prints fully before pressing—wait 5-10 minutes. Crafters prefer coated papers for textiles, as they deliver sharper true color sublimation ink transfers.
Conclusion
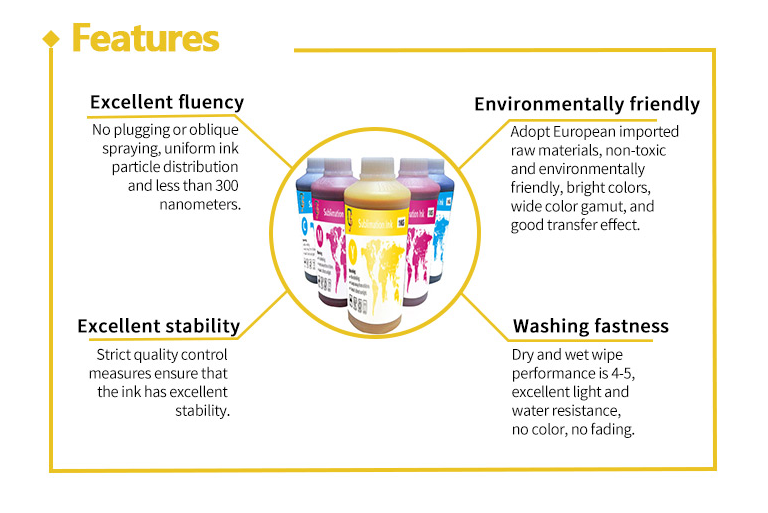
Solving issues with dye-sublimation ink involves multiple steps. The cornerstone of all these steps is the ink itself. Using inferior or incompatible ink is like building a house on a soft foundation. No matter how sophisticated the upper layers, achieving long-lasting, stable, and outstanding results is difficult.
Changfa Digital’s high-performance sublimation inks ensure vibrant colors, smooth output, and durable final products from the very beginning, allowing you to focus on design and creation without worrying about endless printing issues. As a trusted sublimation ink supplier, we offer solutions tailored for digital textile printing. Contact us today at 396838165@qq.com to elevate your prints.


