

HOT SALE


APPLICATION


Phone:+86-15215969856 E-Mail: 396838165@qq.com

If you and your friends aim to start a band and have put together a logo with care, and then you hope to make special T-shirts for it, but feel unsure about the best way to print. In the current scene of custom items, choices such as mugs, clothes, and house decor appear all over. Two usual ways often appear—sublimation printing and heat transfer paper. Both allow you to change thoughts into things you can wear, yet they function differently and fit various situations. Sublimation prints depend on a method where dyes change to gas and join firmly with stuff, leading to bright, tough outcomes. Heat transfer paper, however, attaches designs to surfaces using warmth and force, providing fast setups for lots of cloths. Picking between them might seem hard, mainly if you lack experience. This piece looks closely at transfer sublimation and heat transfer paper, explaining their good points and drawbacks. We will examine actual cases, expenses, and advice to aid you in selecting the proper one for your task. No matter if you do this for fun or manage a tiny company, grasping these can spare effort and cash.
The Core Battle: Principles and How They Work
When choosing between sublimation and heat transfer ways, it aids to begin with the basics. These approaches both apply heat to put on designs, but their basics make them distinct. Picture it as deciding between coloring cloth forever or putting on a sticker that sticks gradually. Sublimation changes inks to gas for deep mixing, while heat transfer counts on sticking. This gap impacts aspects from texture to endurance. Now, let’s explore how each method really works in use.
Dye Sublimation: When Colors Turn into Gas
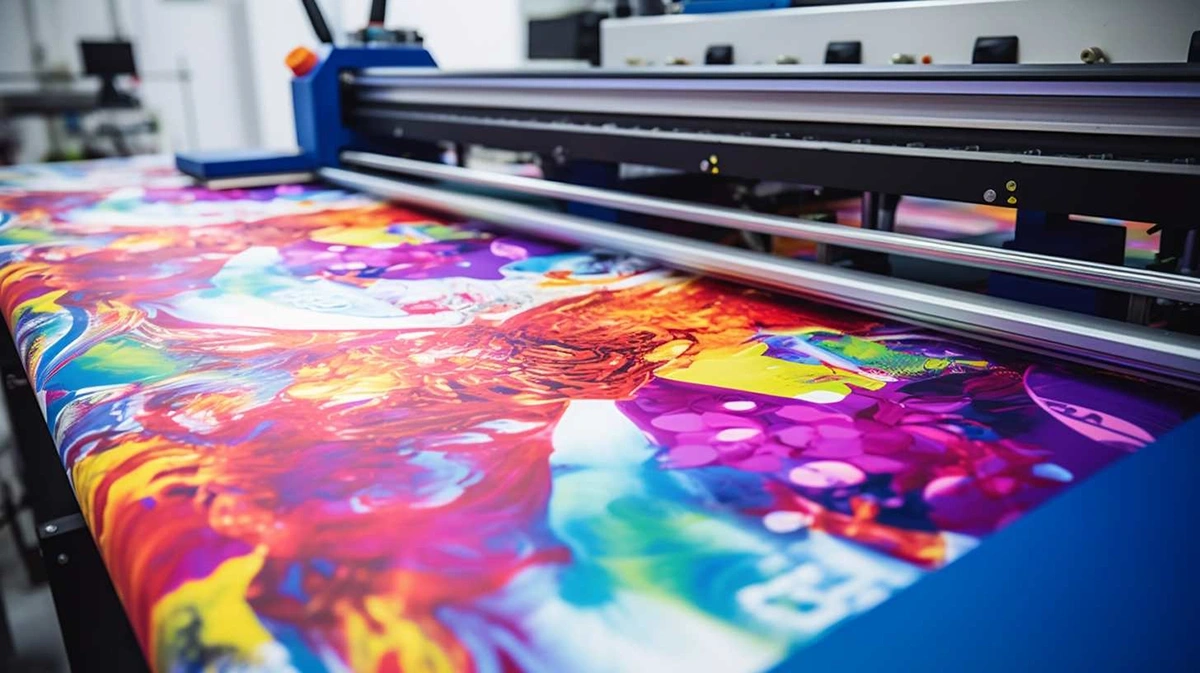
Dye sublimation begins with unique inks printed on sublimation transfer paper. Under strong heat—around 225℃ for about 20 to 25 seconds—the inks pass the liquid stage and turn to gas. This gas soaks into polyester threads or covered areas, like T-shirts. Once it cools, the colors harden directly within the material. It seems as if the design merges with the fabric, not merely resting above. For sublimation prints, this results in no breaking or coming off after many washes. Plenty of people mention items holding up over 50 cycles in a regular washing machine with little color loss.
But it performs well on materials with at least 65% polyester amount. Natural fibers such as cotton fail to grip the gas properly, causing faint effects. If you like transfer sublimation for team shirts or picture presents, this way stands out for its smooth end. Sublimation news frequently points out new ideas in inks that increase color choices, reaching up to 98% more tones than simple methods.
This shift from gas to solid in dye sublimation gives a special advantage for detailed jobs. But what about the attaching method?
Heat Transfer Printing: The Art of Adhesion
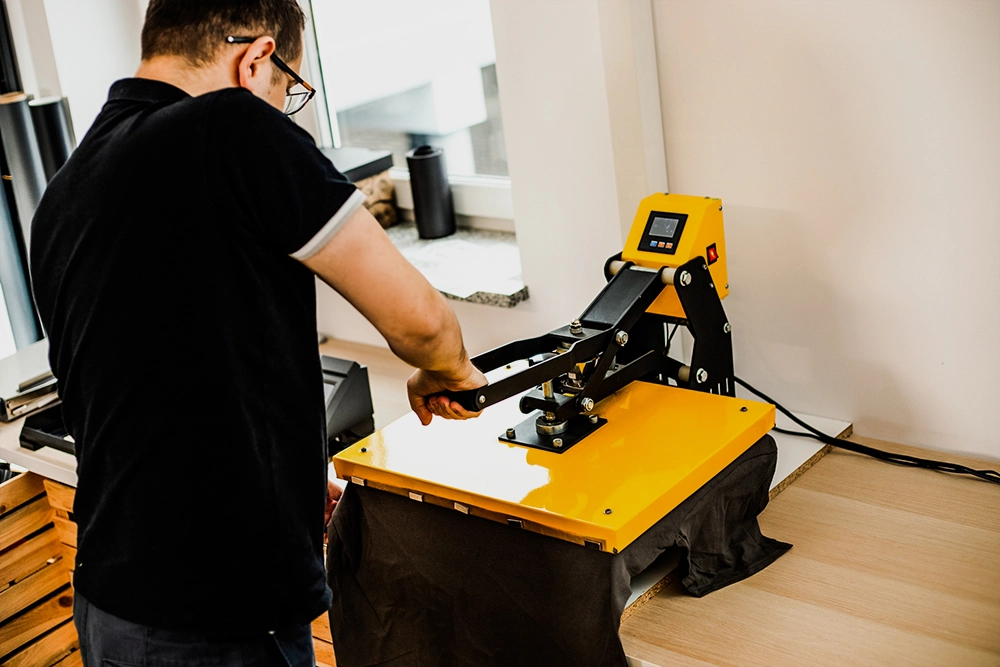
The initial step in heat transfer printing is to print the design backward onto heat transfer paper, which you can do with a standard inkjet or laser printer. Put the paper face down on your object, and use heat from a press at about 177℃ to 190℃ for 15 to 30 seconds. The warmth melts the layer, allowing the ink to stick to the fabric. Remove the paper, and you end up with the picture attached on. It is simple, much like putting on an iron patch but with better handling. This approach deals with a range of fabrics, from full cotton to mixtures, and operates on both pale and deep colors. For dark clothing, you can apply special thick papers to include a white bottom layer, making the colors brighter. Strength changes; some transfers last for 20 to 30 washes if you flip items inside out and use cool water. Heat transfer paper suits quick samples or small batches, since you can begin with equipment you already have. Costs remain low, with paper sheets costing $0.50 to $1 each. Yet, that extra layer might feel a bit rigid at the start, although it becomes softer later.
Heat Transfer Paper vs. Sublimation Printing
After understanding their principles, we can compare them directly. Both ways produce attractive results, but they vary in how the end item feels, endures, and adjusts to materials. For anyone making custom things, these elements decide if your work impresses or fades quickly. Sublimation prints often receive praise in sublimation news for their expert quality, while heat transfer paper succeeds for its range. Let’s measure them together, beginning with the touch and ease that people notice first.
Product Feel
The feel of your finished item can make or break its appeal. In sublimation printing, the dyes blend right into the fabric, leaving no additional film. It stays smooth, similar to the original stuff—ideal for clothes like T-shirts or hoodies where comfort counts. Folks wearing sublimation prints frequently mention that they overlook the design exists. Heat transfer paper, however, adds a slim coating that you can notice, particularly on thinner cloths. It could feel like a light sticker initially, but good papers reduce this. Through washes, it can ease up, but it never vanishes completely. For children’s outfits or sport clothes, sublimation’s no-touch feel wins out. Checks reveal sublimation items rate 4.5 out of 5 in comfort polls, compared to 3.8 for heat transfers. If you use transfer sublimation on polyester, that smooth blending excels.
Moving from touch to toughness, durability tells us how well these methods hold up in real life. Daily use and cleaning put designs to the test, revealing which one stands strong over time.
Image Durability
Durability matters a lot when your task faces rough handling. Sublimation prints connect at a tiny level, making them strong against color loss, cracking, or peeling. Items can survive 50-plus washes with a small drop in brightness, as the color stays inside the fibers. This fits well for sports equipment or giveaway items that see heavy action. Heat transfer paper performs okay, but displays wear signs earlier—around 20 to 40 washes, based on the paper grade. The stuck layer might split if pulled too far or lose color from hot drying. In endurance checks, sublimation usually lasts longer than heat transfers by 30% in color keeping after fake aging. For ongoing projects like sportswear that need frequent cleaning, sublimation printing proves a steady choice. But for single events, heat transfer paper handles the task without trouble.
Beyond lasting power, the type of fabric you choose plays a huge role. Not all materials play nice with every method, so compatibility guides your options from the start.
Fabric Compatibility
Sublimation thrives on polyester or poly-coated items, needing at least 65% synthetic content for the gas to bond. It is not suitable for cotton fabrics because the colors on cotton fabrics fade easily. Light colors work best; darks mute the results. This limits it to things like athletic wear or coated ceramics. Heat transfer paper, however, adapts to cotton, polyester, blends, and even some woods or metals with the right type. It handles dark fabrics well with opaque versions. For a cotton tote bag or dark hoodie, it’s the go-to. Surveys from sublimation paper suppliers show 80% of users pick heat transfer for natural fibers. Sublimation tissue paper can help with printing on mixed fabrics and prevents stains from forming during the printing process.
After discussing fabrics, the next thing to focus on is color quality. Vibrant colors can be eye-catching, but different printing methods will produce different effects depending on the ink and fabric.
Color Vividness
Colors pop differently in these processes. Sublimation offers rich, photo-quality shades with smooth gradients, thanks to the gas infusion. It captures up to 16 million colors, ideal for detailed photos or logos. On polyester, vibrancy hits peaks, with transfer rates over 95% for top sublimation transfer paper. Heat transfer paper gives solid results but can look flatter, especially on textured fabrics. The layer might dull shades slightly, and dark papers add a white base that shifts tones. In side-by-side tests, sublimation scores higher in brightness—about 20% more intense per user feedback. For eye-catching sublimation prints like banners, this edge matters.
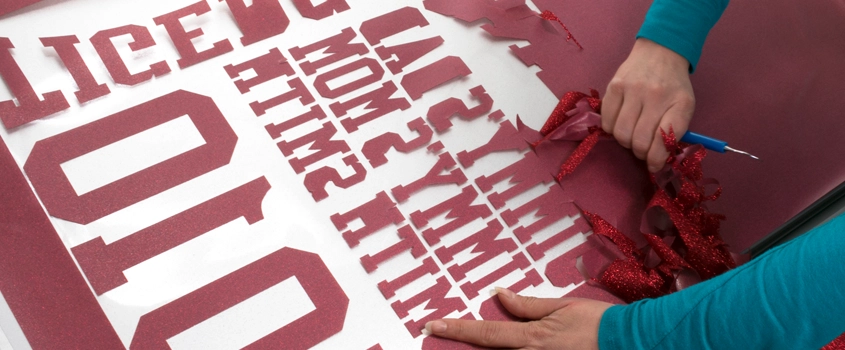
Weeding
Weeding means removing excess material around your design, and it varies big time. Sublimation is self-weeding—only the inked areas transfer, so no cutting is needed. This speeds things up, especially for complex shapes. Heat transfer paper often requires weeding, using scissors or a plotter to trim backgrounds. For simple designs, it’s quick; intricate ones can take 10 to 20 minutes per piece. Dark papers need precise cuts to avoid white edges showing. If you’re batching orders, transfer sublimation keeps things efficient.
How About Their Cost and Practicality?
After comparing performance, costs and ease come into play. These factors hit your wallet and workflow. Sublimation might seem pricier upfront, but it scales well for volume. Heat transfer paper keeps entry low, suiting starters. Let’s dig into the numbers and daily realities.
Initial Investment and Unit Cost
Starting costs differ sharply. For heat transfer paper, grab an inkjet printer for $100, paper at $0.50 per sheet, and a basic heat press around $300. Total entry: under $500. Unit costs stay low—about $1 to $2 per T-shirt, including blanks. Sublimation needs a dedicated printer at $200 to $500, inks $50 per set, and sublimation transfer paper $0.20 to $0.40 per sheet. Add the press, and you’re at $600 to $1,000 upfront. But per-item costs drop to $0.50 for high-volume, thanks to efficient ink use. Reviews show sublimation pays off after 100 pieces, saving 15% long-term.
Design Flexibility and Production Speed
Design-wise, both handle full-color work, but sublimation excels in gradients and photos without limits. You can cover entire items edge-to-edge. Heat transfer paper suits spot designs but struggles with all-over prints due to paper size. In terms of speed, sublimation takes 45-60 seconds per press; heat transfer 15-30. For batches, sublimation’s no-weed setup boosts output—up to 50 items per hour versus 30 for heat transfers. Sublimation tissue paper aids clean runs. Beginners find heat transfer more forgiving for tweaks.
Friendliness for Beginners
Newbies often lean toward heat transfer paper—it’s plug-and-play with home printers, no special inks required. Mistakes cost less, and tutorials abound. Success rates hit 90% on first tries with good guides. Sublimation demands learning ink profiles and polyester quirks, but kits simplify it. In terms of setup time, 30 minutes for heat transfer, and an hour for sublimation.
Conclusion
In the end, dye sublimation and heat transfer printing each bring strong points to the table. Sublimation shines with its durable, vibrant finishes on polyester, ideal for items that see heavy use. Heat transfer paper offers broad compatibility and low barriers, perfect for mixed fabrics and fast starts. Neither is outright better; it boils down to your project’s needs, like fabric type or run size. For vivid sublimation prints that last, go with transfer sublimation. If versatility matters more, heat transfer paper fits.
Success comes from matching technology to materials. For optimal results, choose high-quality consumables. As a trusted sublimation paper supplier, Changfa Digital offers high-transfer-rate sublimation paper, achieving up to 98% transfer and delivering crisp, sharp prints. Whether you’re learning about the latest developments in sublimation technology or about to begin mass production, our products can help you achieve professional-grade printing results. For inquiries or samples, please contact us at 396838165@qq.com.


